Pietra Dura Works.
Pietra Dura Orchid and Butterfly Box
Pietra Dura (Pietre Dure) work in Polymer Clay was discovered by Sue Heaser some years ago. She looked at the technique used in the art world for centuries, whereby intricate pictures could be made by laying pieces of coloured and semi-precious stone together in pre-cut shapes, reminiscent of marquetry in wood. Sue discovered that the same technique worked well with polymer clay and I was lucky enough to see her demonstrate her technique at the British Polymer Clay Guild Anniversary Party/AGM November 2012.
Examples of my work using this technique, and then showing how I expanded on it, are pictured below, with full details, including photographs to show the various stages of the technique. They are listed in the order in which I completed the works.
Examples of my work using this technique, and then showing how I expanded on it, are pictured below, with full details, including photographs to show the various stages of the technique. They are listed in the order in which I completed the works.
Examples of Pietra Dura work.

Blue Bird Box Lid
|
Bird Box
|

Orchid and Butterfly Box
|

Orchid Necklace
|
Blue Bird Box Lid
Blue Bird, Pietra Dura Box Lid.
I was immediately struck by the possibilities of seeing the Pietra Dura demonstration by Sue Heaser, and it brought out all my artistic instincts. I had to wait till the turn of the year before I got a chance to play, and began with a wooden box lid, using as inspiration a (free) picture of blue birds found on the internet. I was immediately hooked, but decided I wanted even more detail in my finished piece that using cut out pieces of clay wouldn't give, even using canes. I began inlaying additional clay on top of the finished piece, adding feather details to the birds chests and outlining the flower petals and leaves. I was fairly happy with the result, less so when it cracked in the oven!! It had taken about 20 hours to do, so I quickly patched up the cracks as best as I could and tried not to be too disappointed. (Luckily I had taken a photo before cooking, which you can see above.)
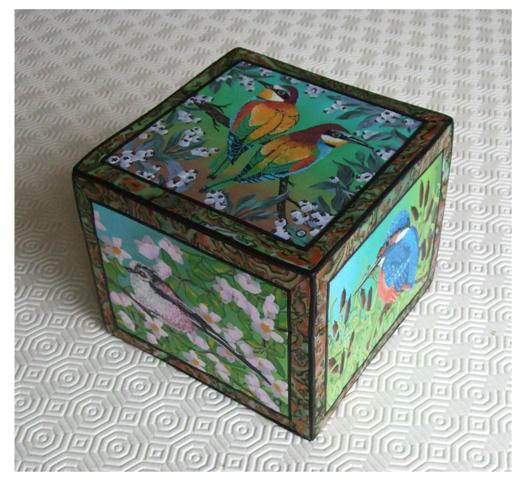
Bird Box
My next attempt continued with the bird theme, but this time I used my own designs, taking a guide from bird photographs (usually about 3 different ones for each bird) and creating my own background scenarios. I decided to make the box completely of clay, so I wouldn't have the same cracking problem - and so I began. About 120 hours later I finished, here are the photos of the piece.

Bird box showing sides 1 and 2
Bird Box showing sides 2 and 3

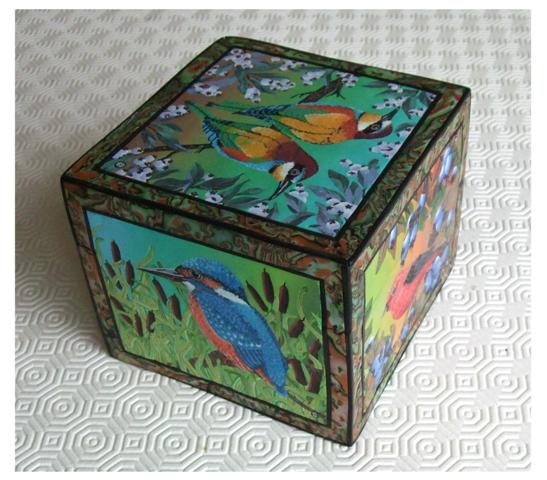
Side Two, Kingfisher in Bulrushes.
Lidded Box.
|

Bird Box showing side 4 and 1
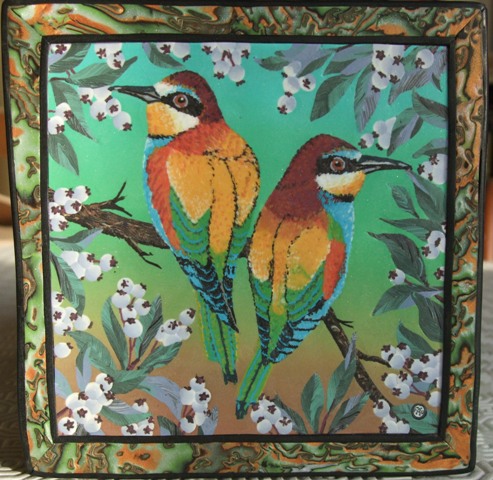
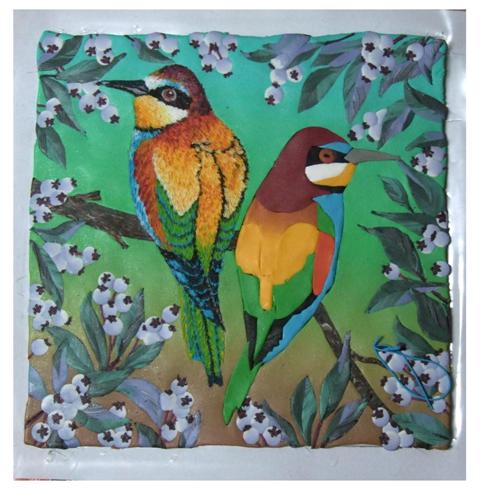
Box Lid, Bee Eaters among berries.

Side Three, Scarlet Tanager in Autumn Berries.
Bottom of Box.
|
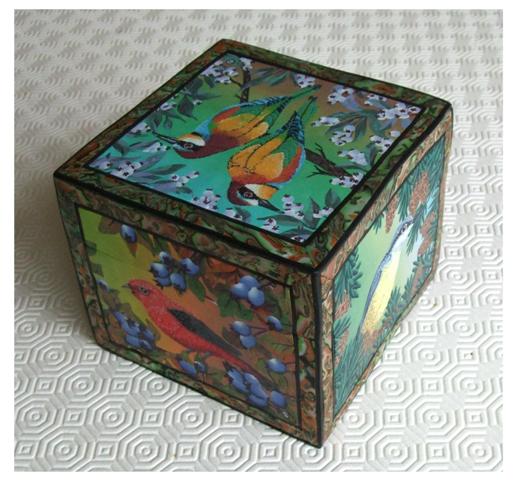
Bird Box showing sides 3 and 4
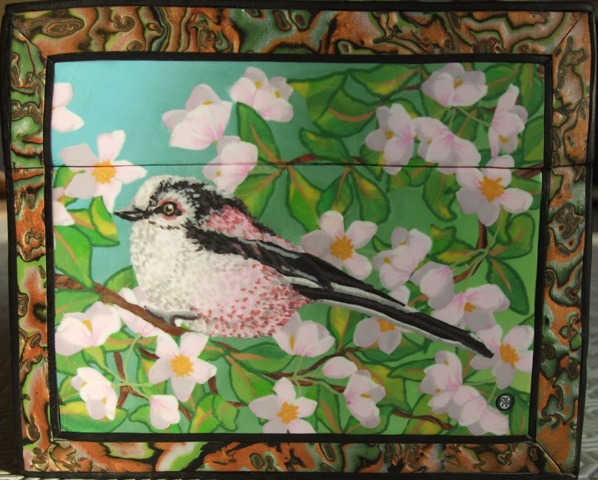
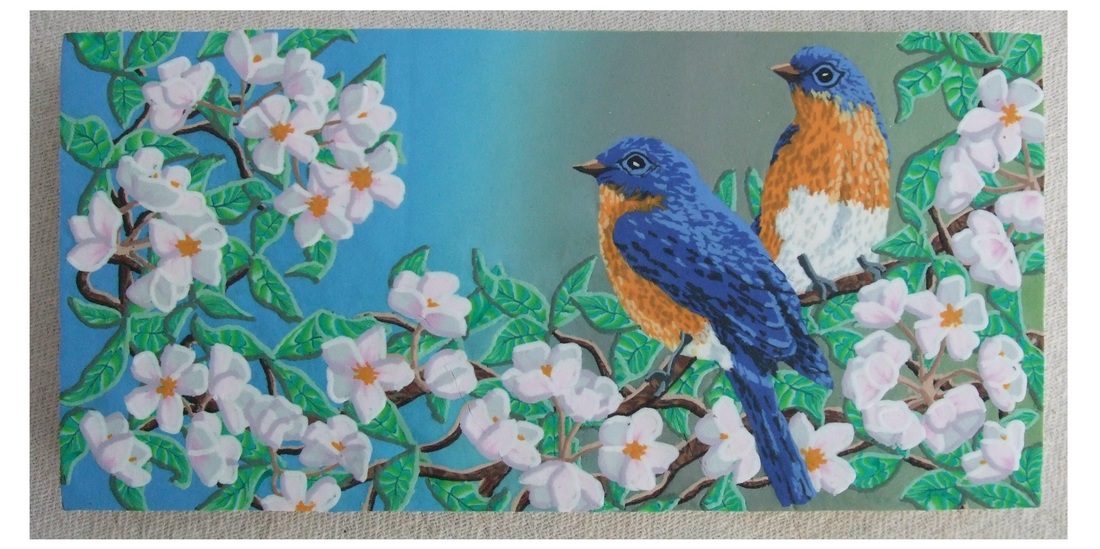
Side One, Long Tailed Tit in Spring Blossoms
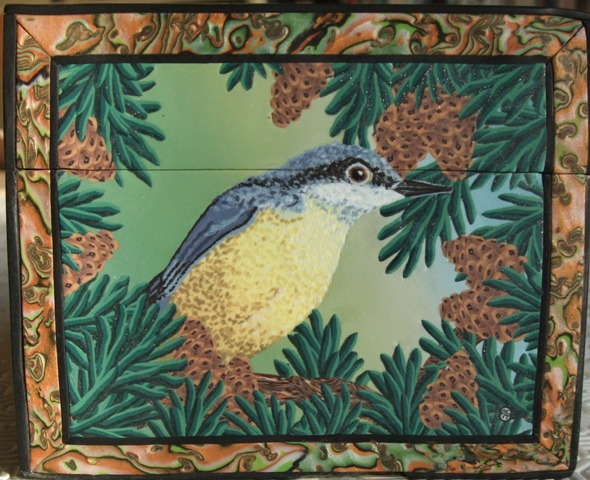
Side Four, Nuthatch with Fir Cones and Pine Needles.
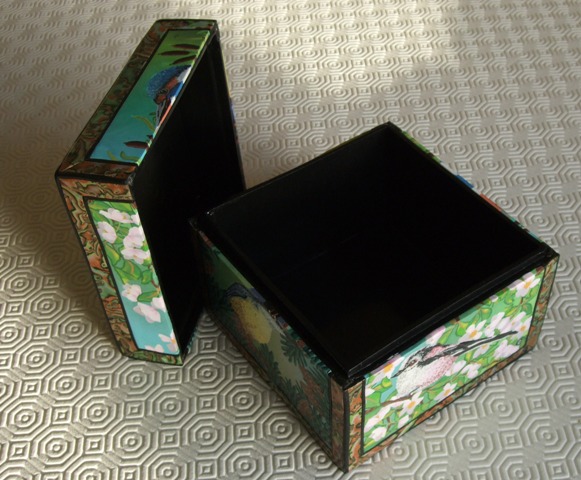
Black Box Interior.
|
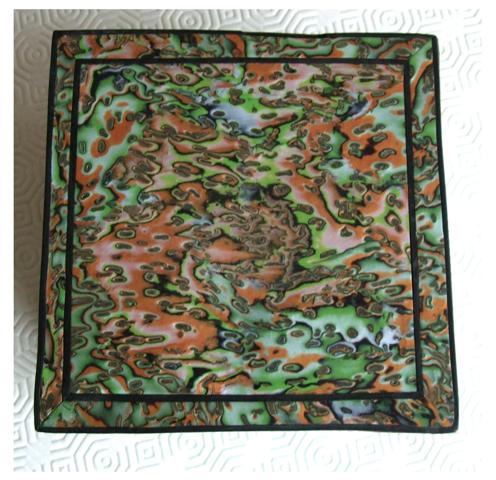
I had various difficulties in completing the box and as a result have learnt loads!! (Something I always say to students, that they often learn more by going wrong than by getting things right first time.) The box is 5 1/2 inches ( 13 1/2 cm) square and 4 1/2 inches (11 cm) high, and has 5 decorative panels of bird pictures on each side and the top, with Mokume Gane edging and base.
The entire piece is made from FIMO Soft and making the box as straight as possible was a struggle in itself as I used no armature, just precooked flat sheets of clay bonded together with liquid clay. The result is not perfectly straight, but the lid fits and I am fairly happy with it. I am now keen to start a box with flowers, as those of you who have seen my paintings know is a love of mine, and can't decide whether to make the box completely from clay again or to have a go round an already formed box.
I have added the photos below to show what the difference is when I spend time adding hundreds of minute flecks of clay, pressed into the surface of the piece to give me a more 'painterly' feel to the panels. I generally completed the backgrounds first and then inlaid the birds as whole pieces, as the photos show. I put the clay colours to be added through an Extruder to help me take the smallest pieces I can, which are then inlaid into the surface clay with a cocktail stick.

Pietra Dura technique for inlaying the bird images.
Left hand bird with additional inlay.
|
Extruded Clay ready to inlay for the bird detail.

Both birds complete and finished panel set on box lid ready to bake.
|
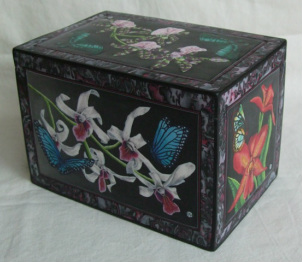
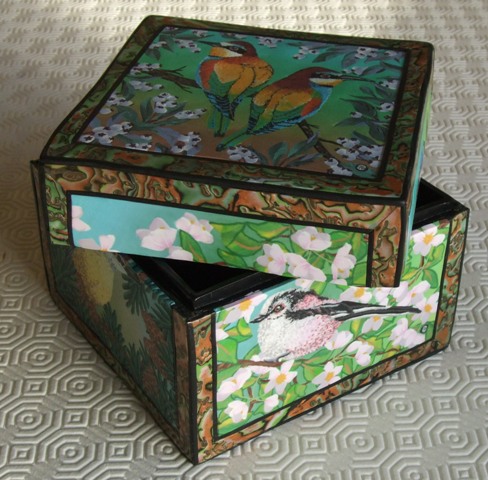
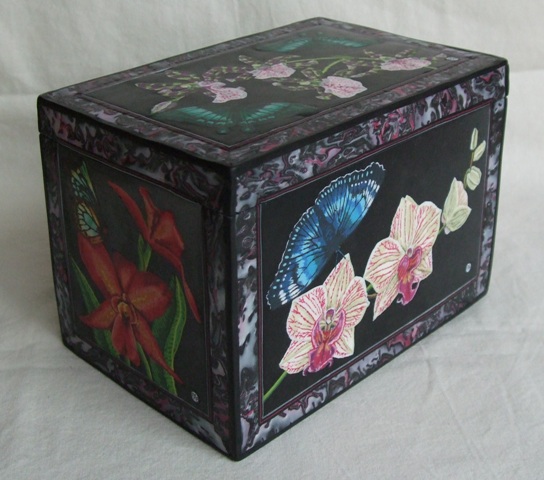
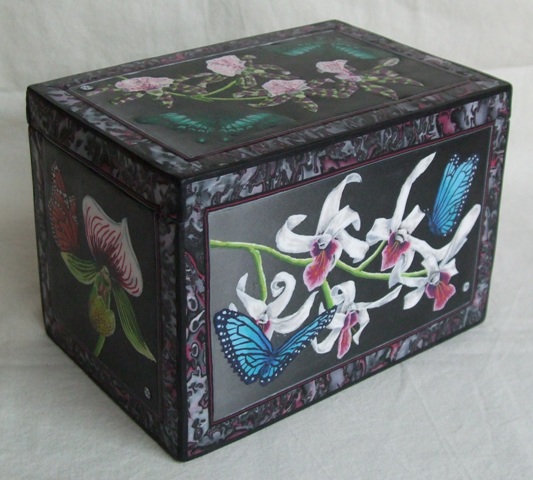
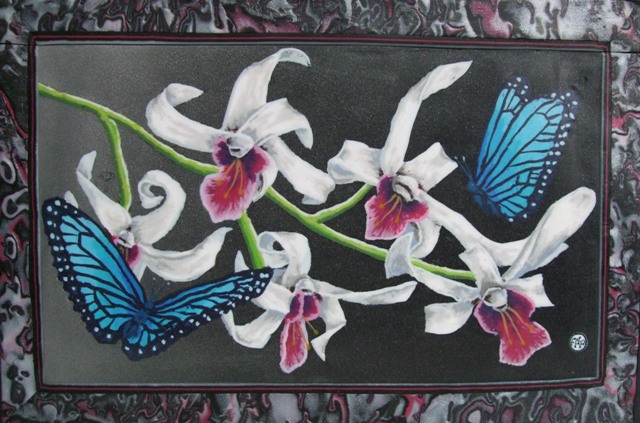
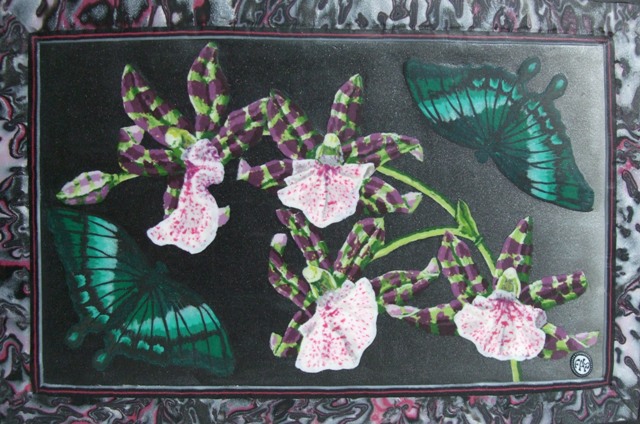
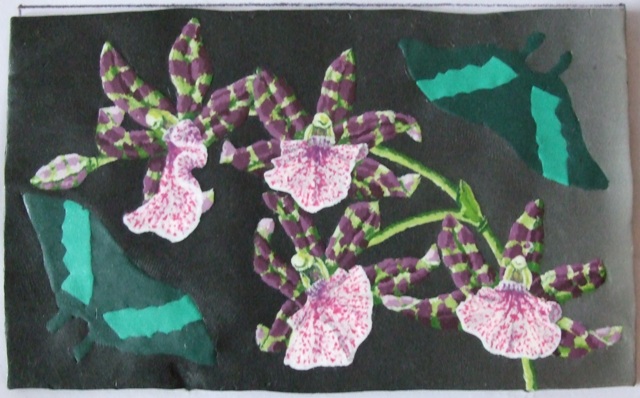
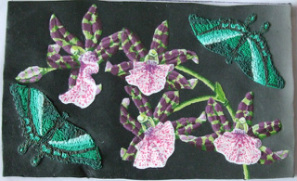
Orchid and Butterfly Box
This is my second attempt at a box. Having had some fantastic advice from Sue Heaser (who details box making in her book 'The Polymer Clay Techniques Book'), I set about thinking how I would construct this one. I needed to do all of the decorative panels on the flat sides of the box first, and then bake, sand and polish them before putting the box together. I thought about dovetail joints, then realised they would be too difficult in the thickness of clay I was using, so decided on a sort of tongue and groove / crenelated form. (I am sure there is a technical term for this, but I don't know what it is.) This worked like a charm, in spite of the complicated templates I had to draw out first, and the box fitted together and baked completely straight and upright with no support whatsoever. The resulting box is pictured below. It is 6 x 4 x 4 inches (15 x 10 x 10cm), has a lipped lid, and a Mokume Gane interior. While still not completely straight, It is about as good as I am likely to get using this technique, and I am just about happy with it.
Box corner on, view 1

Box Side 1
Box end 2
|
Box corner on, view 2
Box side 2

Box with lid off
|
Box Lid

Box end 1
Underneath of Box
|
Making the Box

Box with interior sheets applied, ready to bake.
To make this box I drew up a template for all facets of the box and worked out how the tongue and groove elements needed to join. I then cut the sides and base out and baked them, before applying the interior and exterior decorative sheets which were also baked flat, then sanded and polished. The whole box was then assembled using liquid clay as a glue and baked. The process was repeated for the lid.
I would definitely use this technique again, although each change in size of box would need a new set of templates to work from.
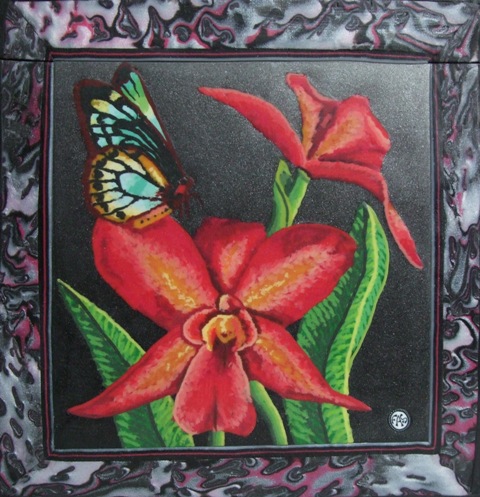
Refining the 'painting' effect.
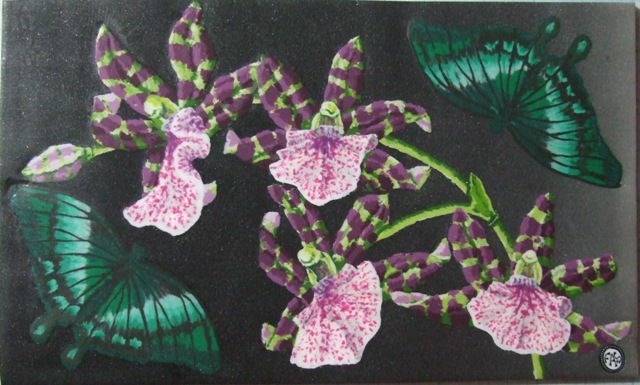
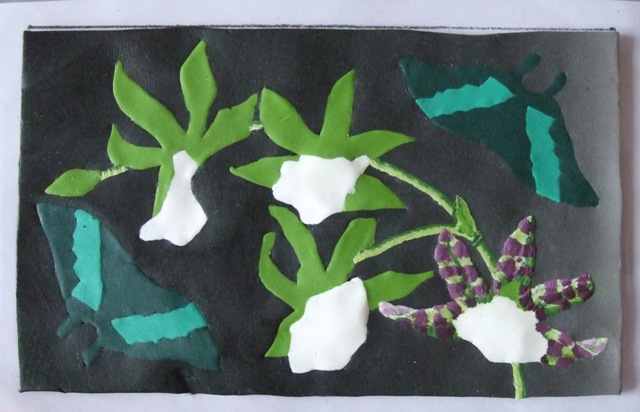
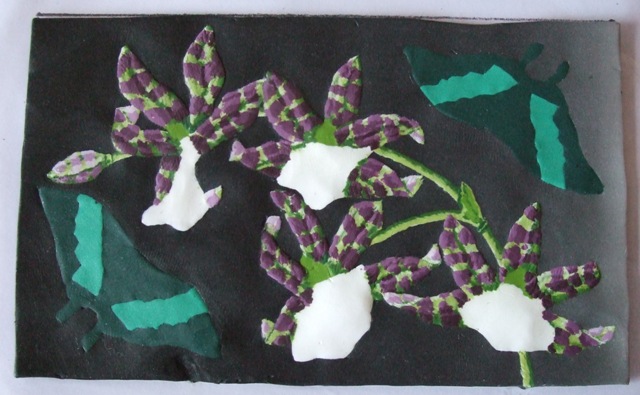
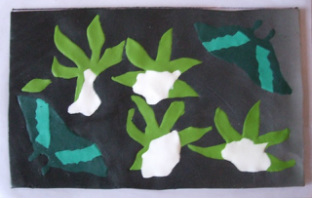
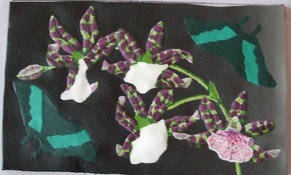
Orchid and Butterfly Box Lid
I learned so much when I made the bird box, but wanted to push this 'painting' technique even further with this box. So I simplified the Pietra Dura, only using the fewest initial colours for the orchids and butterflies, and added all the details in minute pieces of clay to create the finished look. The small additions are pressed flat into the background clay to give a completely smooth finish to the piece.
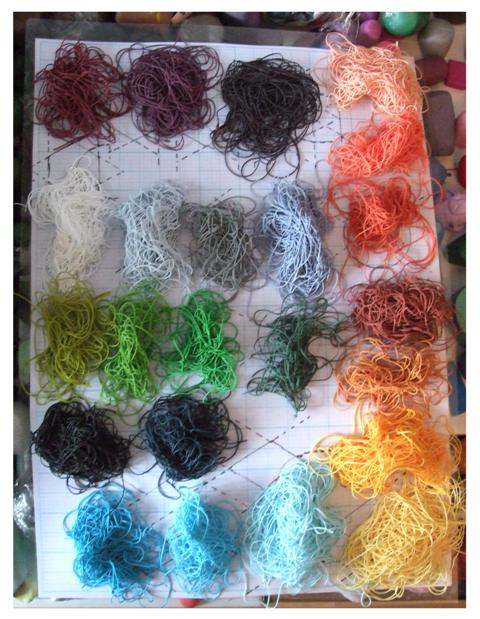
I remembered to take photos as I was doing the box lid which show the whole process below. At the end of the box I had 84 different colours that had been extruded, and I use these long thin extrusions to take the minute flecks of clay which I apply with a cocktail stick. For those who are interested I use a miniaturist extruding disk, made to make 1/12 scale spaghetti, available from Polymini .
I remembered to take photos as I was doing the box lid which show the whole process below. At the end of the box I had 84 different colours that had been extruded, and I use these long thin extrusions to take the minute flecks of clay which I apply with a cocktail stick. For those who are interested I use a miniaturist extruding disk, made to make 1/12 scale spaghetti, available from Polymini .

Initial (rough) pencil sketch.
First back petals with added colours.
All front petals complete.
|
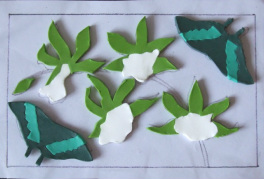
Cut out clay to insert into background.
All back petals complete.
Butterflies with added details.
|
Pietra Dura technique.
First front petals complete.

Completed panel ready to bake.
|
Orchid Necklace
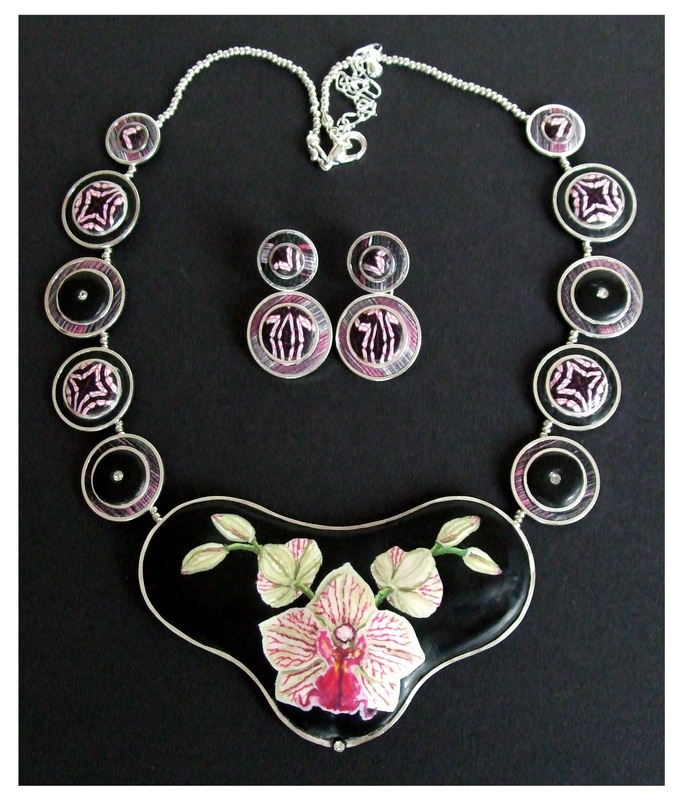
Orchid Necklace with earrings.
Having finished the Orchid Box, I couldn't resist having a go at a necklace (especially as I had the clay all extruded and ready.) I used the encased beads technique I have used before, (PDF Tutorial Encased Beads Necklace available) and then made a large central piece using the Pietra Dura / painting technique I used for the boxes. Again, the clay sits completely flat against the surface giving the look of a painted piece.