| Tiger Face Cane One Some time ago I posted a picture of a Tiger Cane I had been working on. It was all finished and ready to reduce. I covered it all round with scrap clay and waited. While I was waiting, I posted a picture online of the finished cane, and expressed my worries about the reducing process. You see, I did a number of things wrong with the cane. 1. I didn't prepare - it was a spur of the moment to complete the cane and I used what I had with me (I was not at home at the time) which was very old Fimo Soft clay. 2. I didn't have time to finish the cane, and left it half finished for 6 months. 3. To finish the cane I had to cut the whiskers into the bottom half of the face that I had done previously - and the clay wasn't that keen on re-joining itself. 4. I used extremely old scrap clay (nearly 10 years old) both for the background pattern and to cover around the cane So all in all, not a good start. I waited several weeks before I began to reduce it, just to let the clay have a chance to settle, and become united. I had loads of good advice on how to reduce a large, old cane, and tried to do most of it, but I don't think any advice would have made a difference with the mistakes I had already made. Half way through reducing it (which was physically very tough as the cane was now 9 inches by 7 inches by 3 inches thick) I felt something move inside - and yes, I should have stopped at that point - yet another mistake! I carried on reducing it and then I cut through - nothing, not even half a face left. That was probably the lowest point of my Polymer experience so far, and if it wasn't for the fact I had posted a picture on line, I would have simply crawled away with my tail between my legs, nursing my pain. Literally all I had left was the one photo of the finished cane, I hadn't even taken a slice off before I reduced it - which was great advice from someone - because by the time I got the advice it was already covered with scrap clay waiting to be reduced. But because I had posted that picture on line, and because everyone had been so kind and supportive, I picked myself up and started again - determined this time to get it right. | 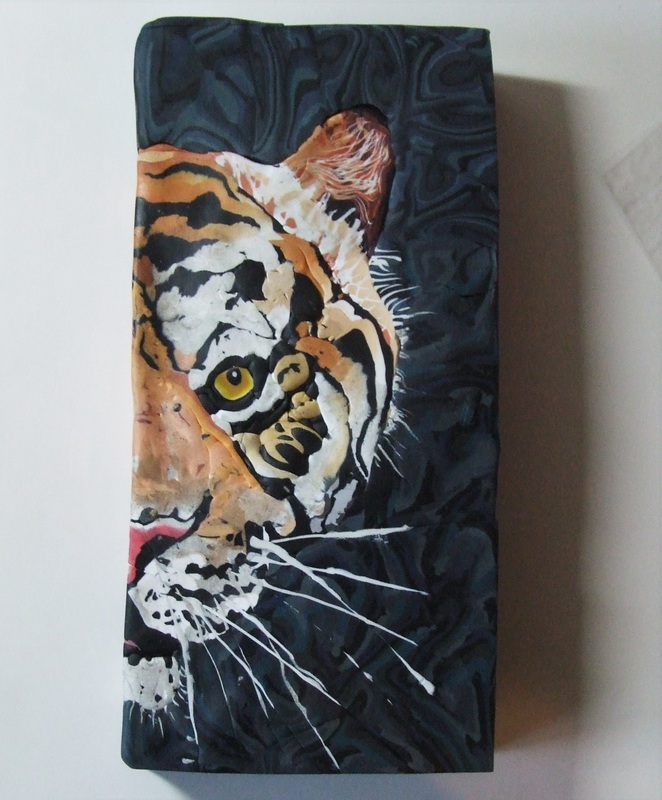 Tiger Face Cane One 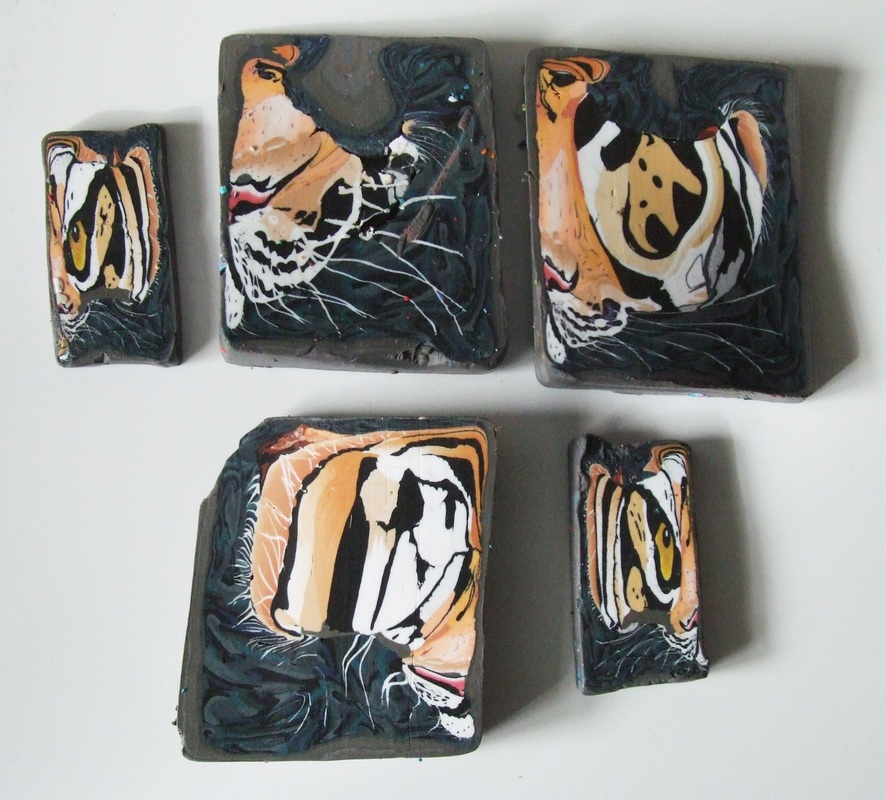 All that was left of cane one. |
Tiger Face Cane Two.
Here is a slideshow of the second cane being made.
| So, on to Tiger Face Cane Two. This time I prepared, I conditioned all my clay to the same pliability (this time I was using Kato Polyclay) and mixed all the colours I would need. I set aside 3 days to complete the cane, and off I went. This time it went okay I thought, as I completed the cane. I input the whiskers as I got to the appropriate point, and the clay, all being the same condition joined back nicely - indeed, this time I could just open up a gap to insert the whiskers rather than having to cut through the whole cane as I did last time. This cane was also a little smaller, just under 6 inches (14cm) by 3inches (7cm) by about 1 1/4 inch (3cm) thick. I then made a decision on reducing - this time I wouldn't cover in scrap clay, as I had felt so out of control last time not being able to see anything of the pattern as I was going smaller. So after cutting off a slice so I would always have an actual piece of clay in the final pattern, no matter what happened, I put registration lines down all the sides that the face pattern didn't touch. I had problems finding 2 acrylic blocks the right size, so cobbled together some smaller ones for the second one. I waited several days and then, very, very slowly began reducing. It was extremely hard with that size and very slow going - trying to fit fingers in between the blocks is hard work, but gradually it went until I had the size I needed. Then the moment of truth - cutting through. I wold love to say it was perfect - it wasn't - but it was good enough that after a bit of manipulation to his bottom cheek and jaw it had reduced to a passable finish. However, further down the cane got better, and the jaw came true. To the right is a pendant that I have made from the cane. These pendants are a limited edition and I have just a couple left. If you wanted to own one, contact me using the contact page on this website. As with everything I do with polymer, I have learnt so much from doing these two canes (I have only done 3 previous picture canes so am relatively new to these big pictures that need to remain unchanged with reduction, you don't get this problem with kaleidoscopes !! ) and I am eager to do another when I will put all my new experience into it and hopefully get it to reduce even better next time. Maybe not a tiger this time though, |  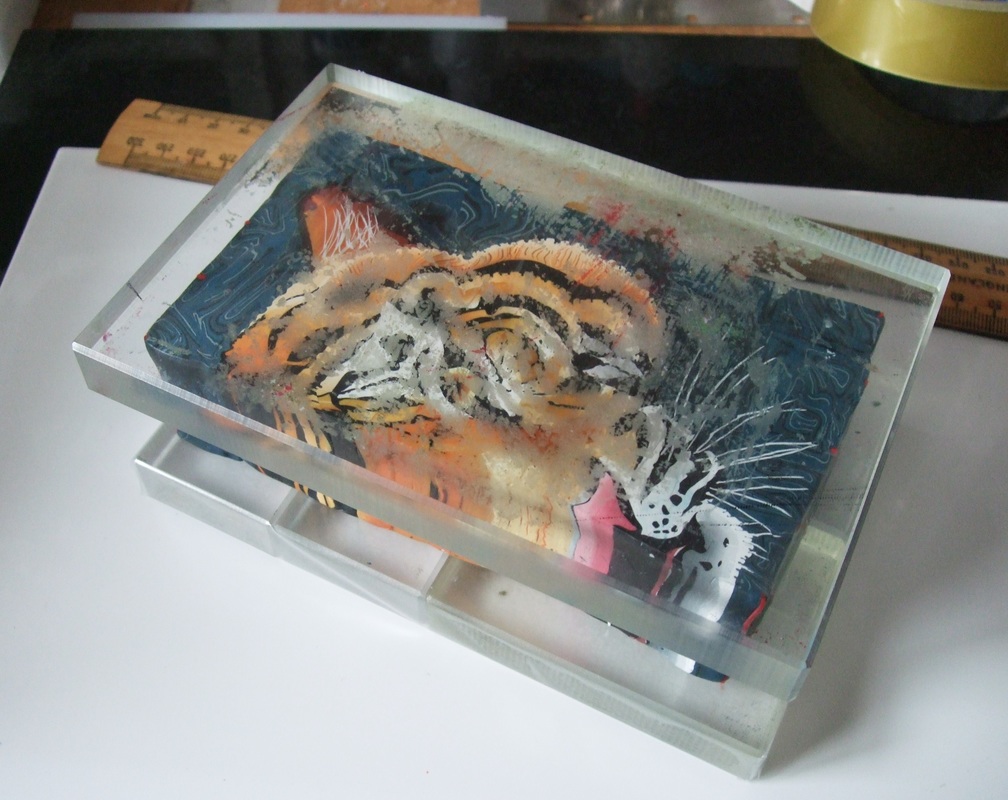 |
 RSS Feed